

How To Repair Drip System Leak
Repair Baste Irrigation Guide: How To Fix It Yourself Without Your Gardener
Drip irrigation is a very common water-wise method of watering plants in Southern California. Virtually homeowners inherit drip systems with their homes or accept them installed during landscaping renovations, but not many people ever tinker with them.
Pressure builds, hoses get stepped on and weather can wear on the parts. Eventually, small-scale leaks or fifty-fifty huge gushers tin and exercise occur negate the water-wise reward of the organisation. Or, possibly you need to move some plants around.
In either case, in that location is absolutely no need to rely on your gardener to administer these small fixes, considering you can do information technology yourself at a fraction of the expense. Here'due south how.
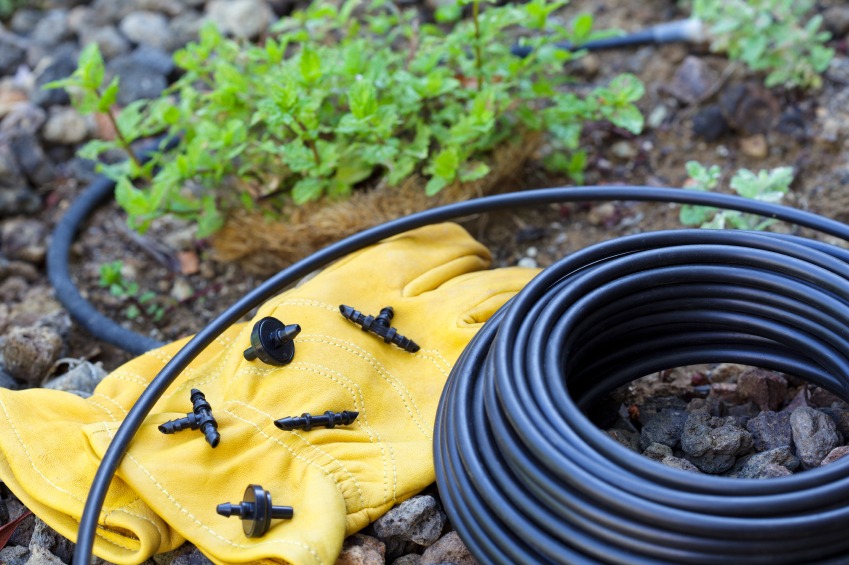
Baste Irrigation Parts to Proceed on Mitt
In instance of emergency, it'southward always all-time to go on a stash of these inexpensive parts in the garage. Call back that drip fittings clamp themselves together with an air tight seal that does not involve glue.
1. Drip irrigation tool –
The style depends on the manufacturer but this handy gadget is totally necessary to save your fingers and wrists from the unnecessary stress of jamming plugs and emitters into stubborn tubing. This tool can insert plugs with ease, punch holes in tubing for hoses and emitters, and some even take precipitous pair of scissors attached to cutting tubes when needed.
2. Plugs –
When holes wear in the main tubing or perhaps yous need to rearrange things based on plant growth, plugs (often referred to equally goof plugs) will terminate leaks. Insert them using the baste irrigation tool or by hand.
3. Waterproof tape –
Now, this won't come in your standard drip irrigation starter kit but having waterproof tape on paw for the teeny tiny hairline leaks is sometimes enough to solve the trouble in an easier mode than slicing up the line.

4. Drip emitters –
These are the gadgets that control the amount of h2o that drips into your soil. Between the clay in your yard and minerals in household water, drip emitters clog easily and need to be replaced. For this reason, it's a adept idea to plough on your system and cheque each emitter regularly to avoid unexpected plant death.
A variety of different emitters be. Some look like discs with pocket-sized tube sticking out while others look a little bit like a faucet. The nearly mutual emitters drip 4 liters/hour of h2o, which equals roughly a gallon. The period speed is ordinarily written on the emitter but information technology's tough to see in the all-time of times, and tin can fade with prolonged use.
If you take plants on a drip organization that aren't getting enough h2o, change the emitter to 8 liters/hr or higher.
v. Couplers –
While not completely necessary to have on hand, couplers are straight, "L" shaped or "T" shaped unremarkably to assistance weave your main baste tubing effectually your g in an orderly mode.
half dozen. Extra tubing –
We'll get into this in more than depth below.
Things to Know Virtually Drip Tubing

Before you leave and buy a bunch of drip supplies, remember that not all tubing is equal.
Drip tubing is the thicker tubing (normally about .5 – one.v inches in diameter) that the emitters and other distribution tubing are attached to. Retrieve of it as the major artery running through your garden.
Distribution tubing is the smaller, normally 1/4″ in diameter, tubing that delivers h2o to plants via the emitters if the chief baste tubing to a higher place is is far abroad.
Emitter tubing tin can be any size merely already has spaced internal emitters inside that are usually 12 – 18 inches autonomously. It looks like a hose with holes in it and is handy for watering things like basis comprehend or evenly-spaced plants.
Soaker hoses slowly seep h2o with less accuracy into a big or pocket-sized space. We have a 1/4″ soaker hose in our vegetable garden because we change out the plants there frequently and became tired of re-arranging baste lines.
And, the virtually of import part to remember is that in that location is an internal hose diameter and external hose diameter. The baste fittings that yous buy must friction match the internal dimensions of your tubing to avert major headaches and concrete strain. For example, 1/2″ drip tubing can come up in these diameters (ID equals internal bore and OD equals outside diameter):
1/2-inch – .520″ ID x .620″ OD
one/ii-inch – .600″ ID x .700″ OD
one/two-inch – .615″ ID 10 .710″ OD
This may seem like a minuscule difference merely it is not. If y'all're only getting familiar with DIY drip irrigation, Rainbird has a started kit for sale on Amazon that contains the basics. However, a proficient dominion of pollex is to stay with the aforementioned manufacturer in one case you become started as a good manner to make sure your fittings always jive with the tubing you have.
Fixing Baste Irrigation
one. Plugging a small-scale hole –
Attach a plug to your drip tool and shove it into the hole. Make sure the seal is airtight and secure. This also works if you lot need to plug the end of a drip distribution tube.
2. If the pigsty is big –
You may need to splice it out of the tubing which involves making a clean cut on each side of the pigsty and removing that section entirely. Reconnect the two hoses using a direct coupler.
3. Connecting new drip distributor tubing to main drip tubing –
Over again, it depends on the organisation or brand you're using but commonly, you'll dial a smaller, barbed coupler into the master tubing using your nifty drip tool. Connect ane terminate of the 1/4″ tubing to the other end of the affront. The other end of the i/iv″ tubing will have an emitter or micro-sprinkler.
If yous can master number three above, you lot tin literally change your entire baste system around at will. And, don't forget to run drip lines to planters in lieu of watering them by manus.
Installing Microspray Baste Irrigation
Using footstep iii above, instead of attaching emitters to the stop of the drip distribution tubing, y'all can attach a microspray sprinkler. You can attach a variety of microspray heads that may spray 90°, 180°, 360° and more.
These are more than effective typically in areas that are dense with plants or ground comprehend.
The Importance of a Pressure Regulator and Filter
Older drip irrigation systems and those installed by professionals looking to cutting cost and try may not have force per unit area regulators. Household water pressure is ordinarily effectually 40 to 60 psi where as a baste irrigation system functions better at around 20 to thirty psi. Water that enters your drip organisation comes from your business firm and without a pressure level regulator, baste emitters and hoses can blow off of the tubing.
There other must-have is a filter to catch sand and other particles before they reach your thirsty plants. And, don't fret if there'south a path or paver walkway prohibiting you from extending drip irrigation into a new space. At that place are ways to safely bore a hole underneath. Yous may want to consult a gardener to accost these slightly more complicated bug.
Your Plough…
Do you set your ain baste irrigation or expect for your gardener to do it?
Photo credit: istockphoto, Flickr/plong and Flickr/USDAgov, Creative Eatables ii.0
Source: https://www.installitdirect.com/learn/repair-drip-irrigation/
0 Response to "How To Repair Drip System Leak"
Post a Comment